Phase 1: Capture Your Run
Steps 1-4: Set up the band, record clean footage, and upload for analysis.
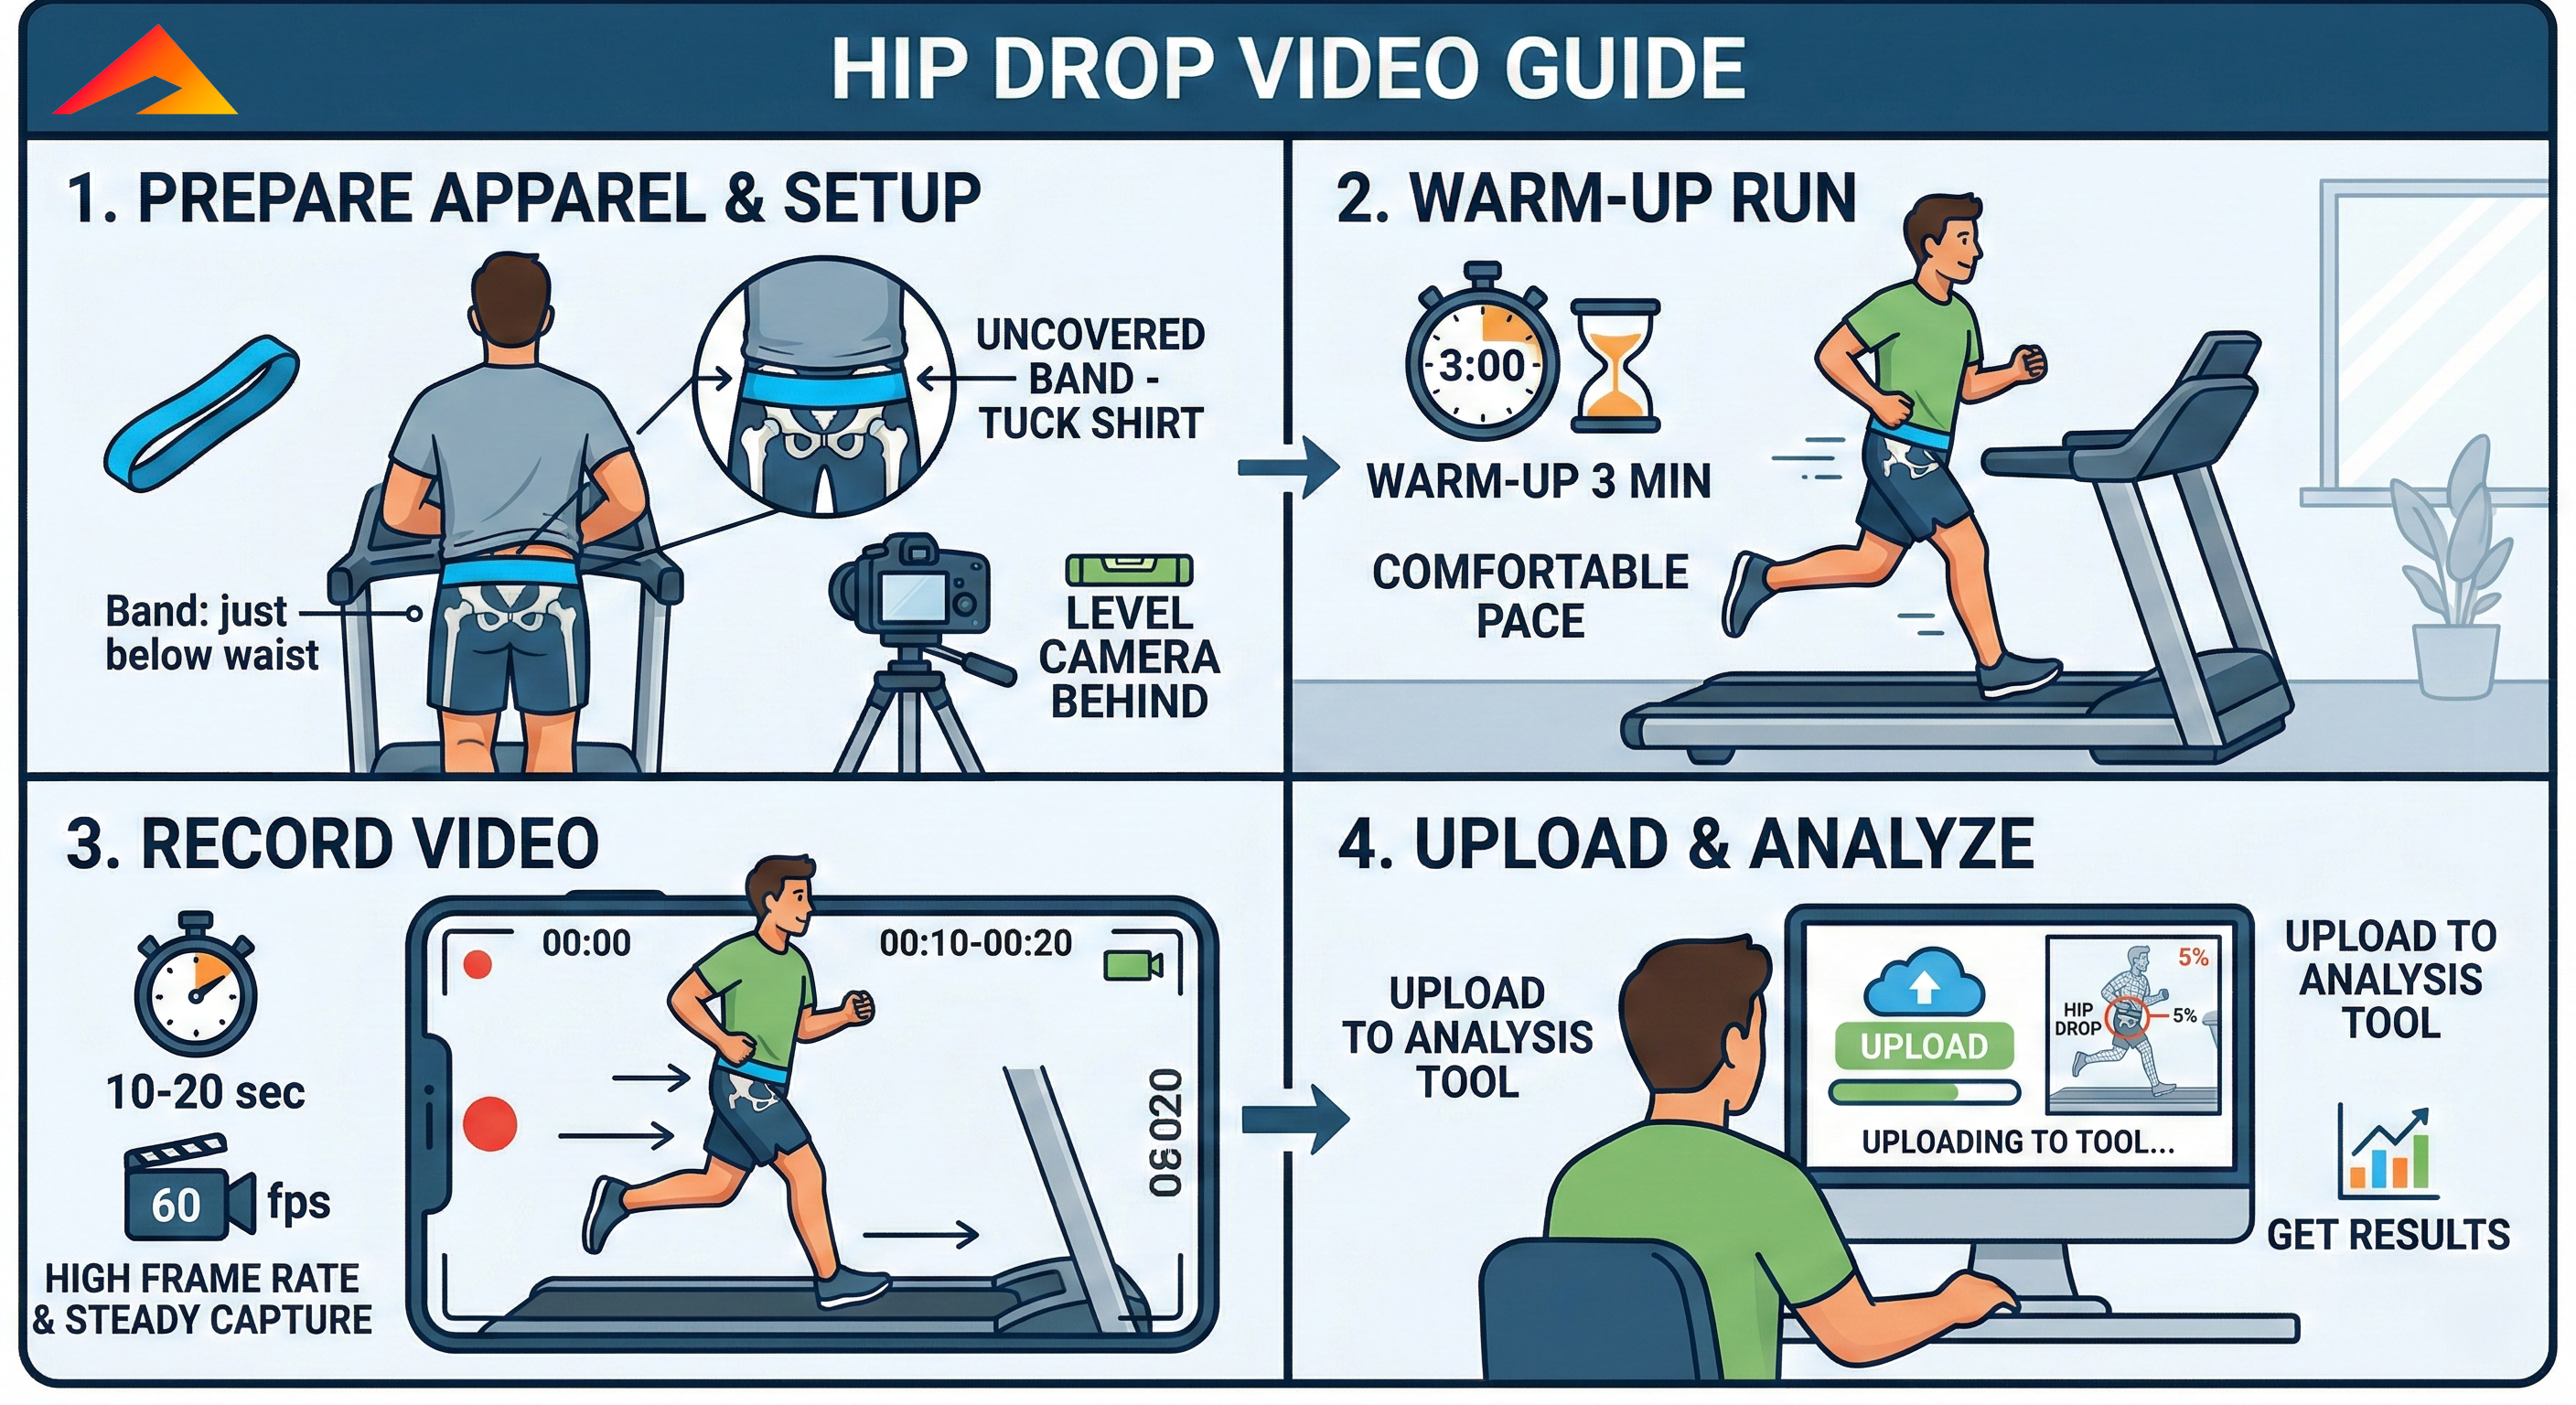
Follow these four steps to get a usable reading. The quality of the hip drop result depends heavily on clean camera position, visible landmarks, and a consistent treadmill effort.
Step 1: Prepare Apparel & Setup
Place a resistance band firmly around your pelvic area, just below your waist. Keep your shirt tucked in and make sure no clothing covers the band so the AI can detect it clearly.
Set your phone or camera on a tripod directly behind the treadmill, level with your hips.
Step 2: Warm-Up Run
Warm up on the treadmill for exactly 3 minutes at your comfortable, normal long-run pace before you begin recording.
Step 3: Record Video
Capture 10 to 20 seconds of footage. For the best AI tracking, set the camera to 60 fps whenever possible.
Step 4: Upload & Analyze
Upload the video directly into the browser tool. The AI processes your biomechanics in seconds and returns a hip drop percentage.
