AI Shot Put & Discus Analysis

The Ring app in /ring turns one rotational throw into a coachable report. This page keeps the essentials only: how to film a discus throw, how to use the app, and the main coaching cues to watch.

AlphaPeak logo

Film one clean rotational discus throw, keep the full athlete and discus visible, and use the report to coach the throw phase by phase.

Best results come from a slightly open ring view, bright light, a stable camera, and high frame rate. Keep the setup the same from session to session so the report stays comparable.

1080p minimum 60 fps preferred One throw per clip Slightly open ring view Full athlete + implement visible
Recording instructions for shot put and discus analysis

Part 1: Record The Throw

Clean discus footage is what makes the phase frames and coaching cues usable.

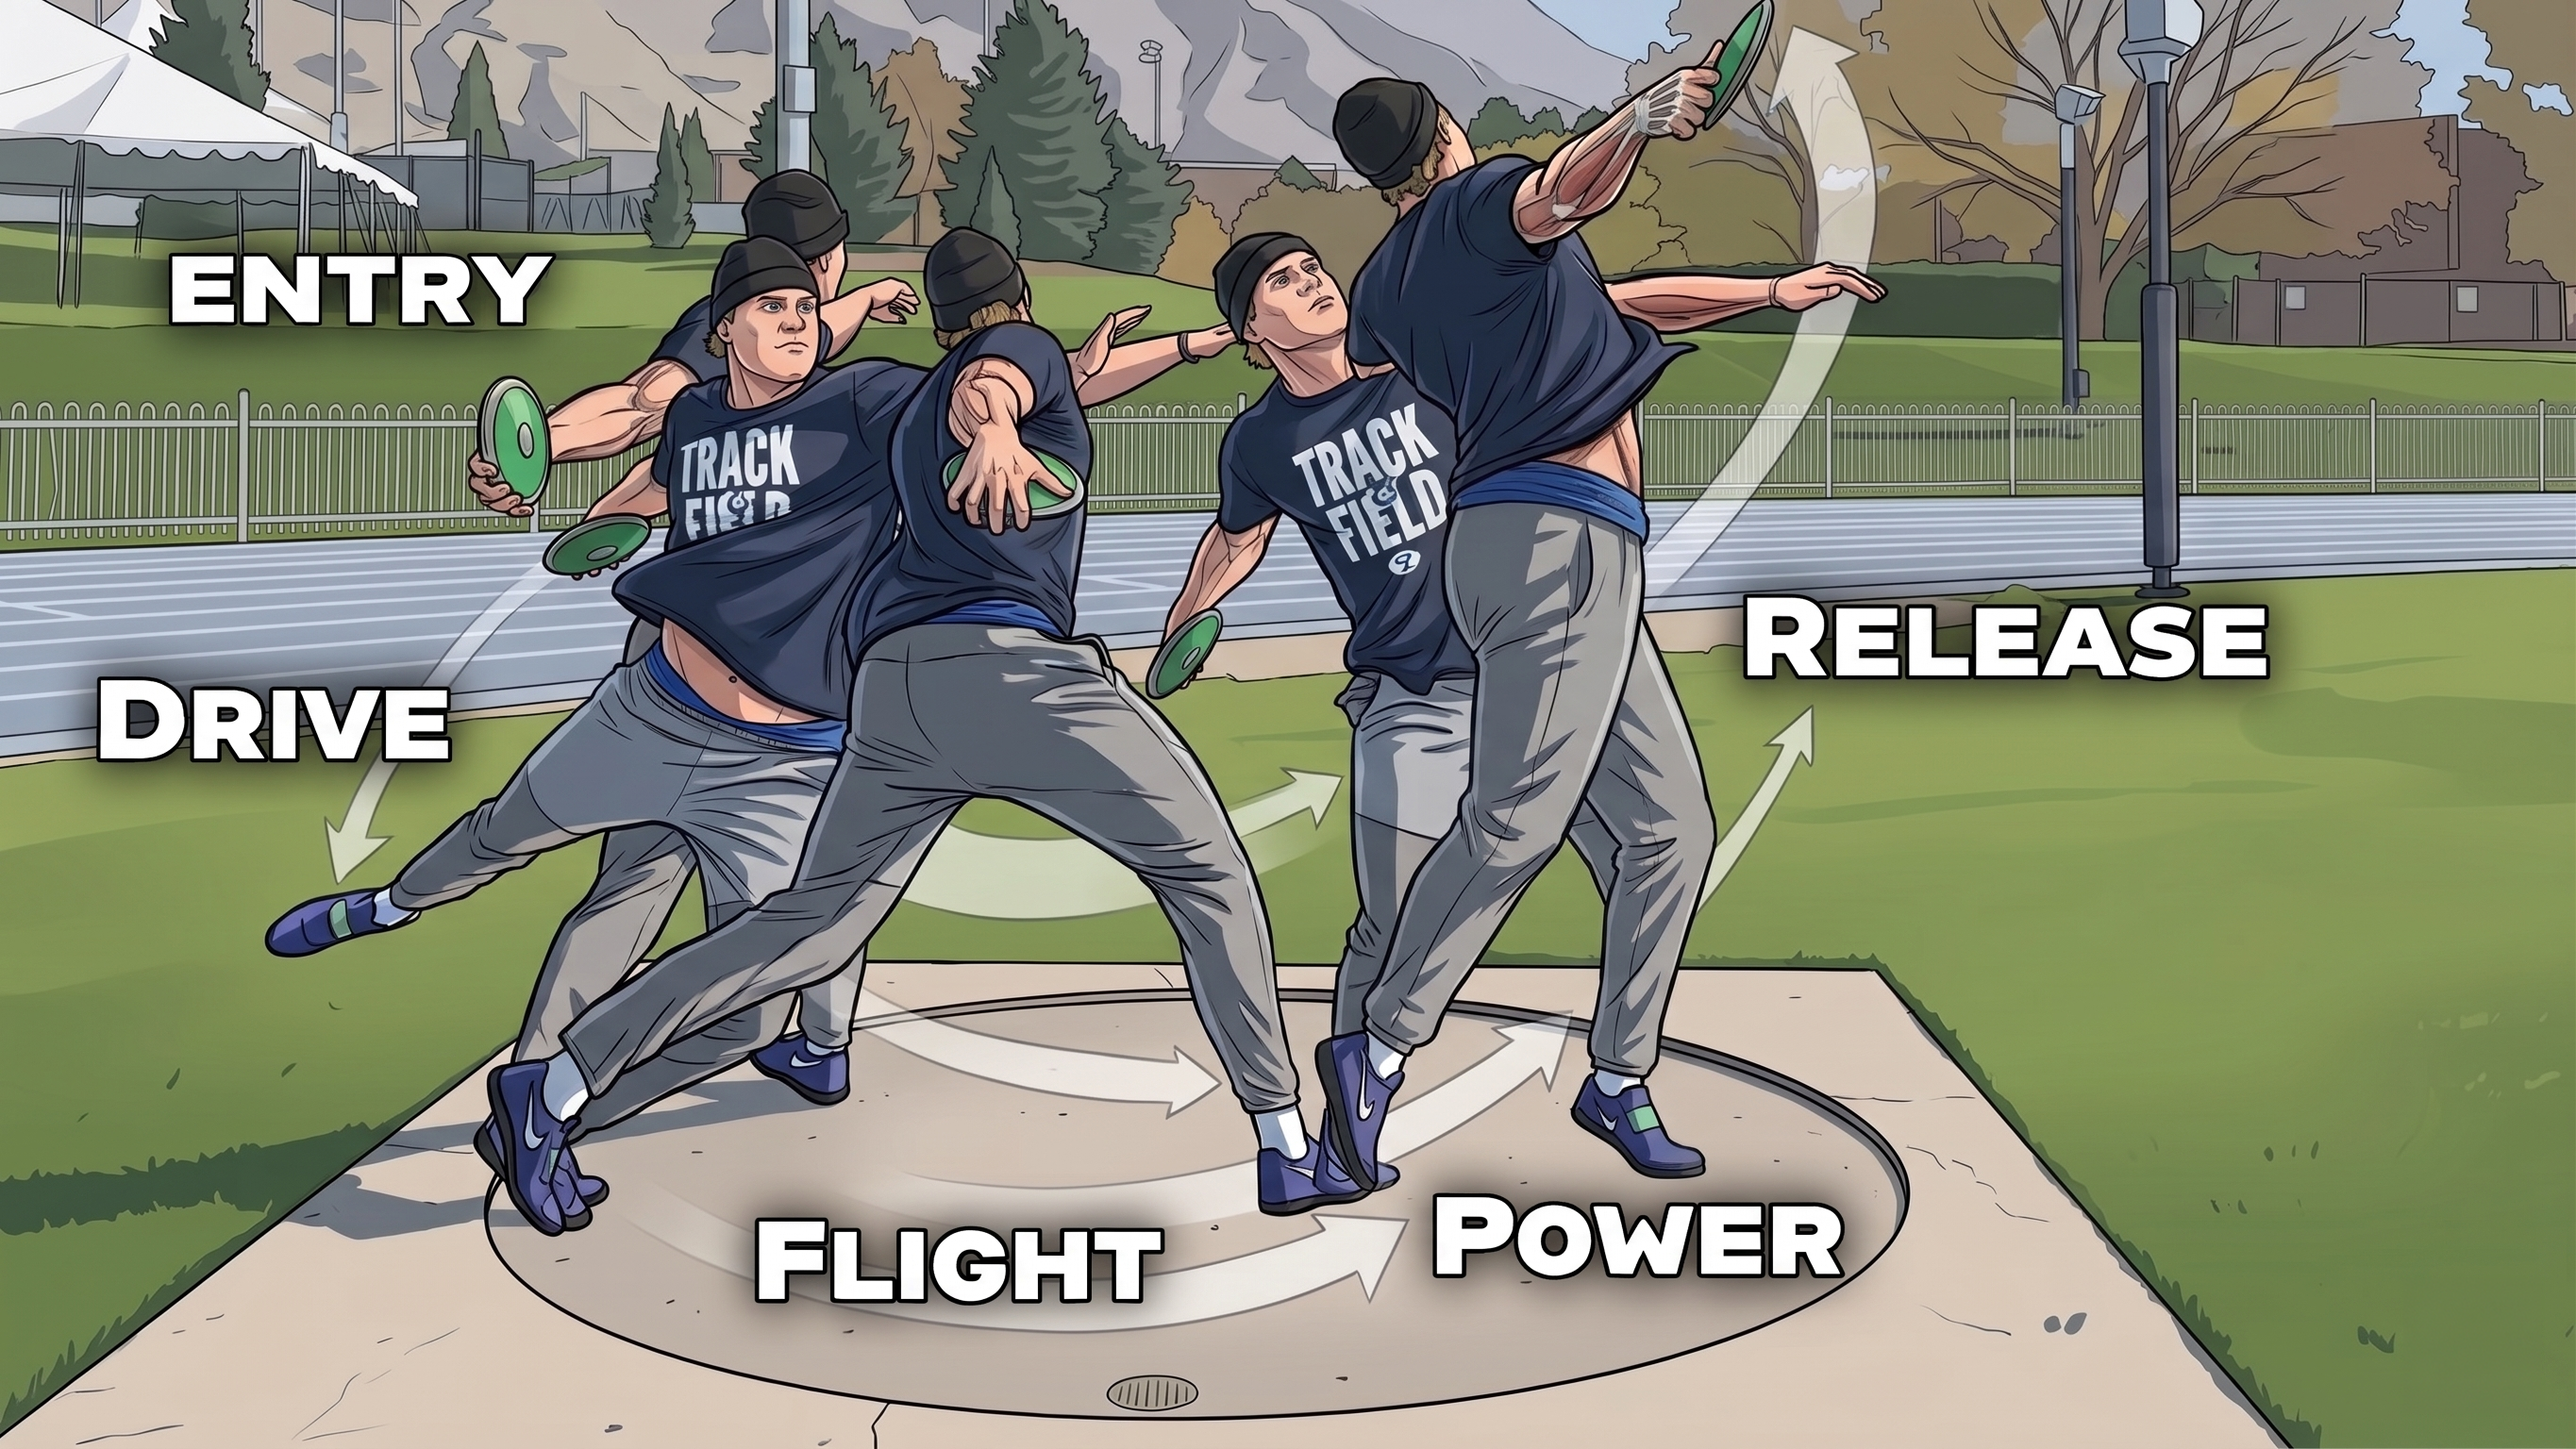
  • Record one rotational throw per clip. Start before setup and keep recording through the reverse and finish.
  • Use a slightly open side or rear-quarter ring view. The app needs to see both hips and shoulders clearly.
  • Keep the full athlete and discus in frame. Do not crop the feet, arm path, release, or recovery.
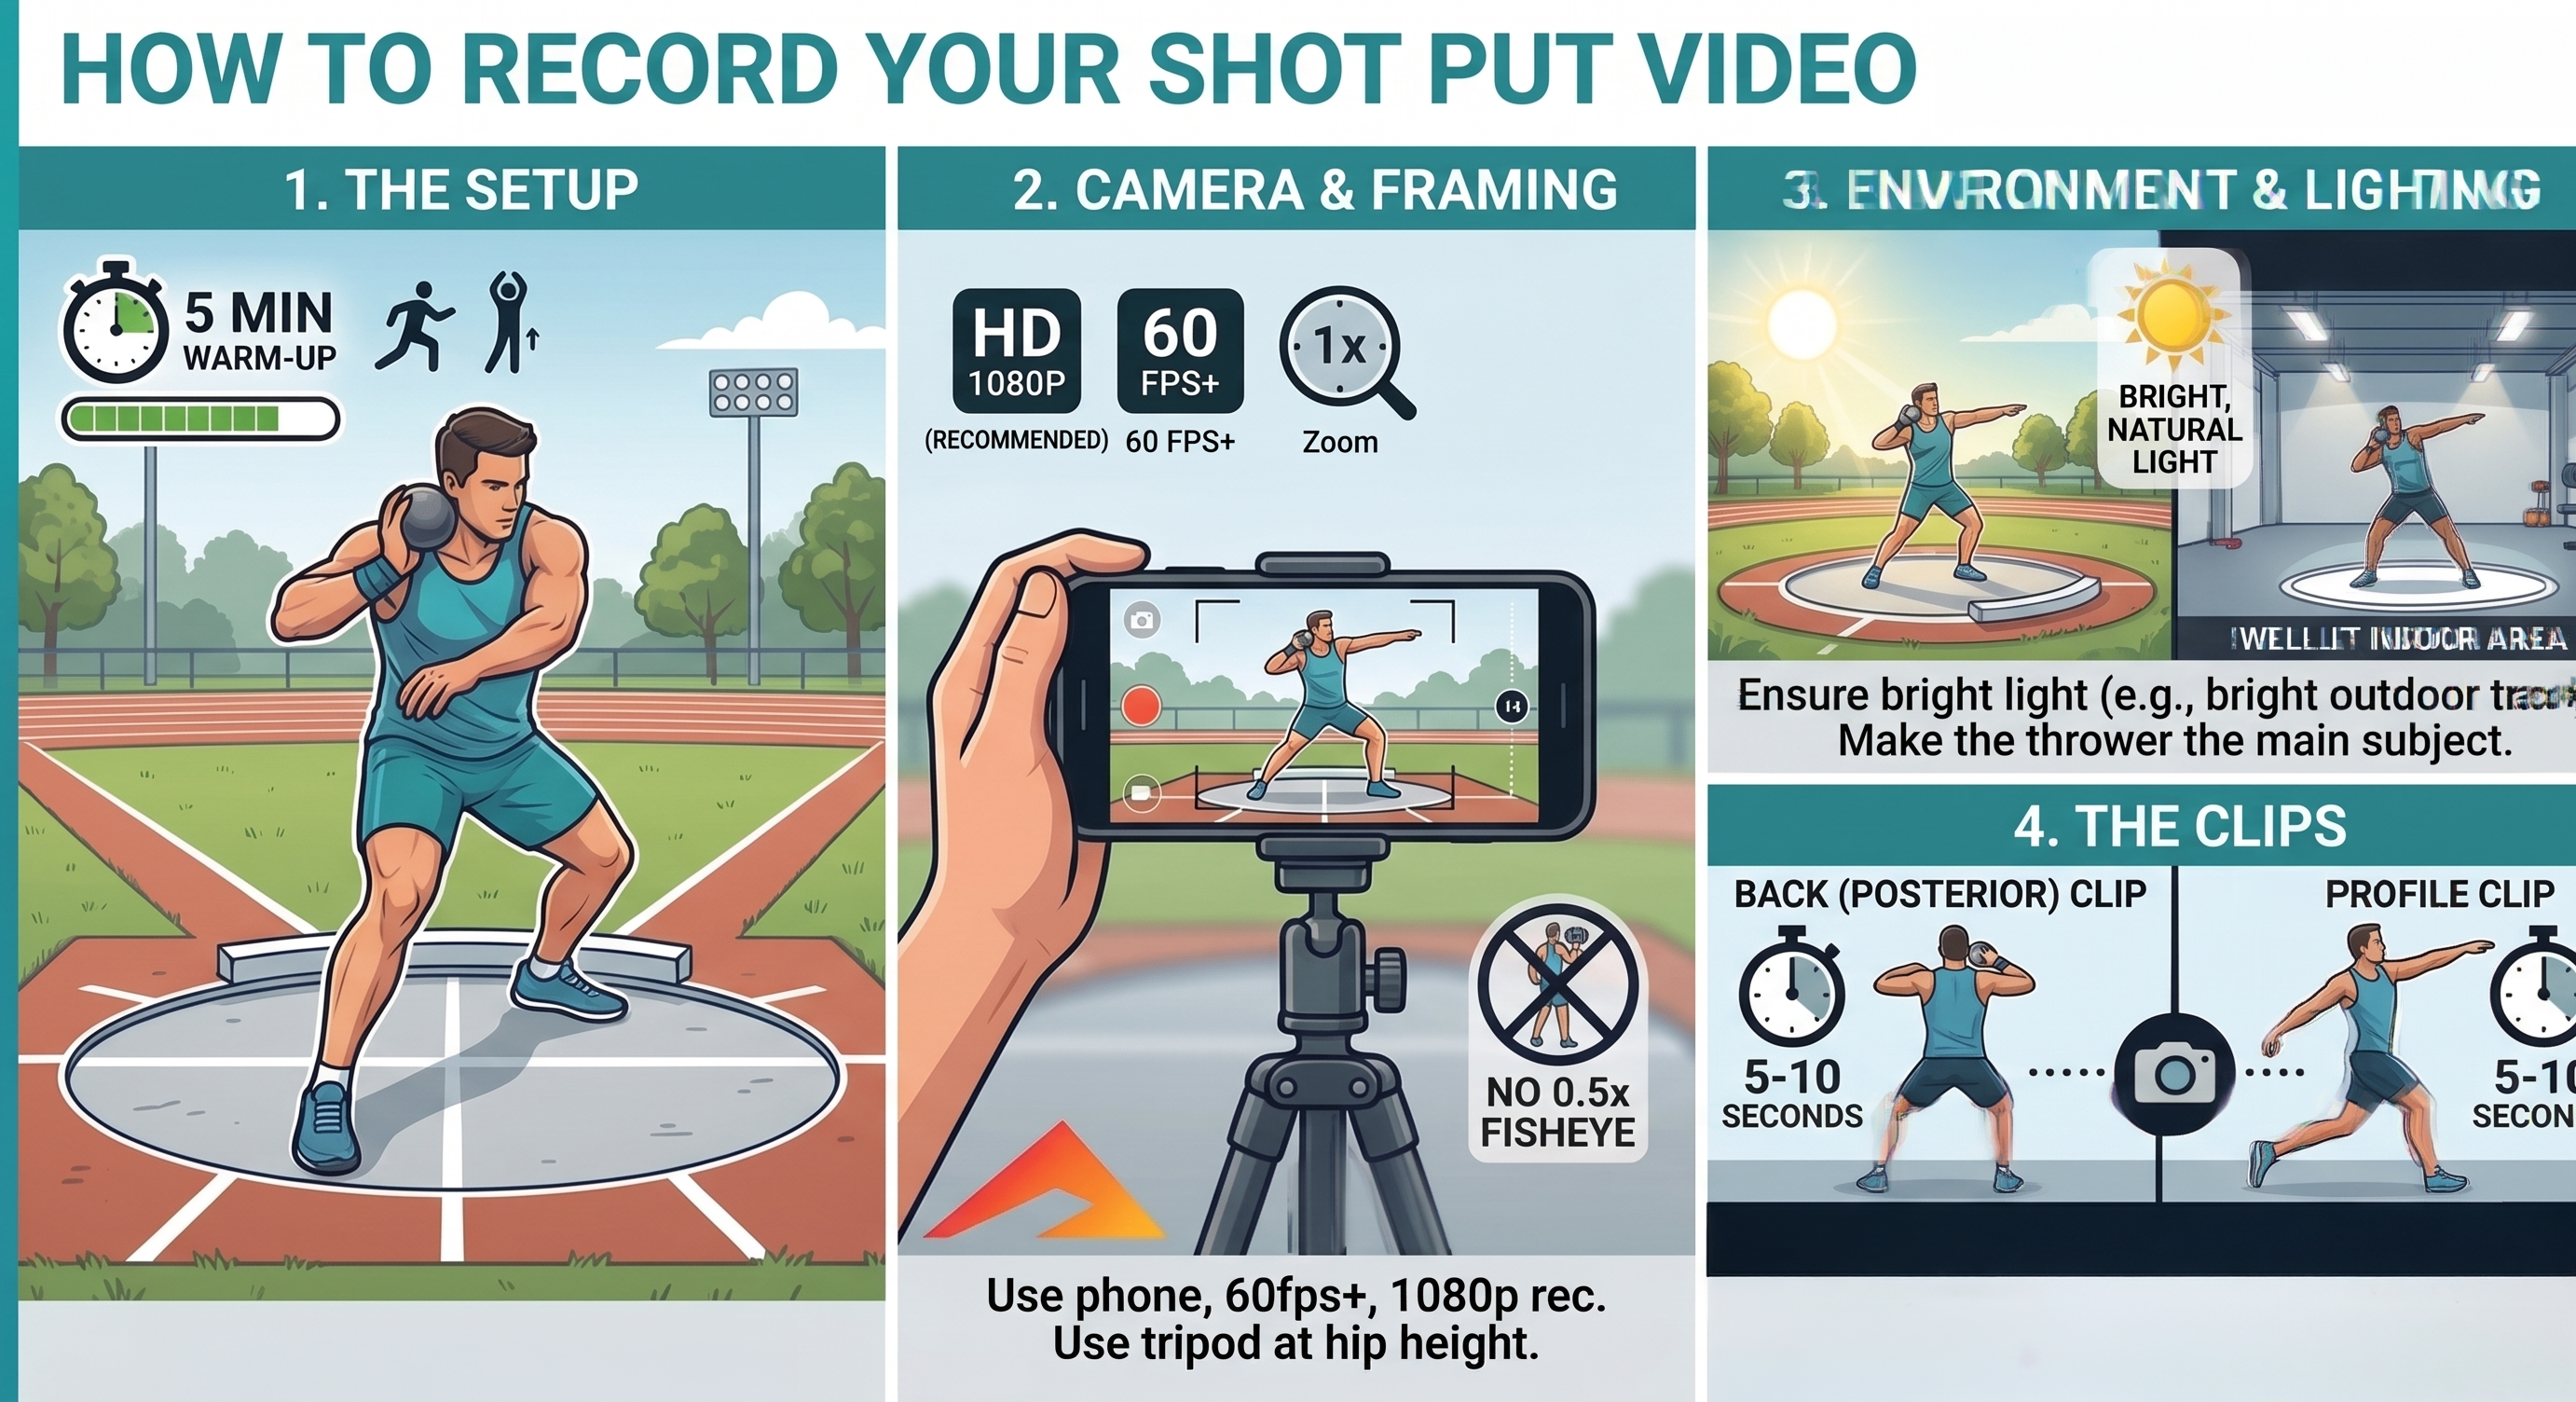
  • Film at 1080p minimum and 60 fps if possible. Higher frame rate gives cleaner phase locks and release-path reads.
  • Set the camera around chest-to-shoulder height. Keep it stable and use bright light with a clean background.

Keep the same view, height, and distance every session. Consistent filming makes the next report much more useful.

Part 2: Use The App

Upload one throw, check the phase frames, and coach the earliest phase that broke down.

  • Select discus and the correct athlete side. The report and cues depend on the right throw setup.
  • Review the six key frames: setup, entry, drive, power position, release, and recovery.
  • Use the score as a summary. The real coaching value is in the phase cards and notes.
  • Use Results to create the PDF. It gives an overall score, short coaching notes, and one annotated snapshot for each phase.

If the phase frames look messy or late, fix the filming first or retest with a cleaner clip before coaching the numbers.

Shot put and discus phase breakdown for setup, entry, drive, power, release, and recovery
Shot put and discus report layout with score, quick metrics, and analysis cards

Part 3: Main Discus Cues

Coach the throw in a simple order: stay low, stay wrapped, block cleanly, and finish under control.

  • Setup: sit into the throw and start from a balanced base.
  • Entry: turn the block-side foot first and stay low out of the back.
  • Drive: move across the ring, not up. The center should keep traveling.
  • Power position: land loaded over the throwing foot with the arm long and back.
  • Release: keep the center behind the block, post tall on the front side, and send the discus out on a clean line.
  • Recovery: reverse under control and stay inside the ring.

If several things look wrong at once, start with entry and drive first. In discus, the biggest gains usually come from staying low through the middle, holding separation, and finishing into a firmer block.