Capture Setup
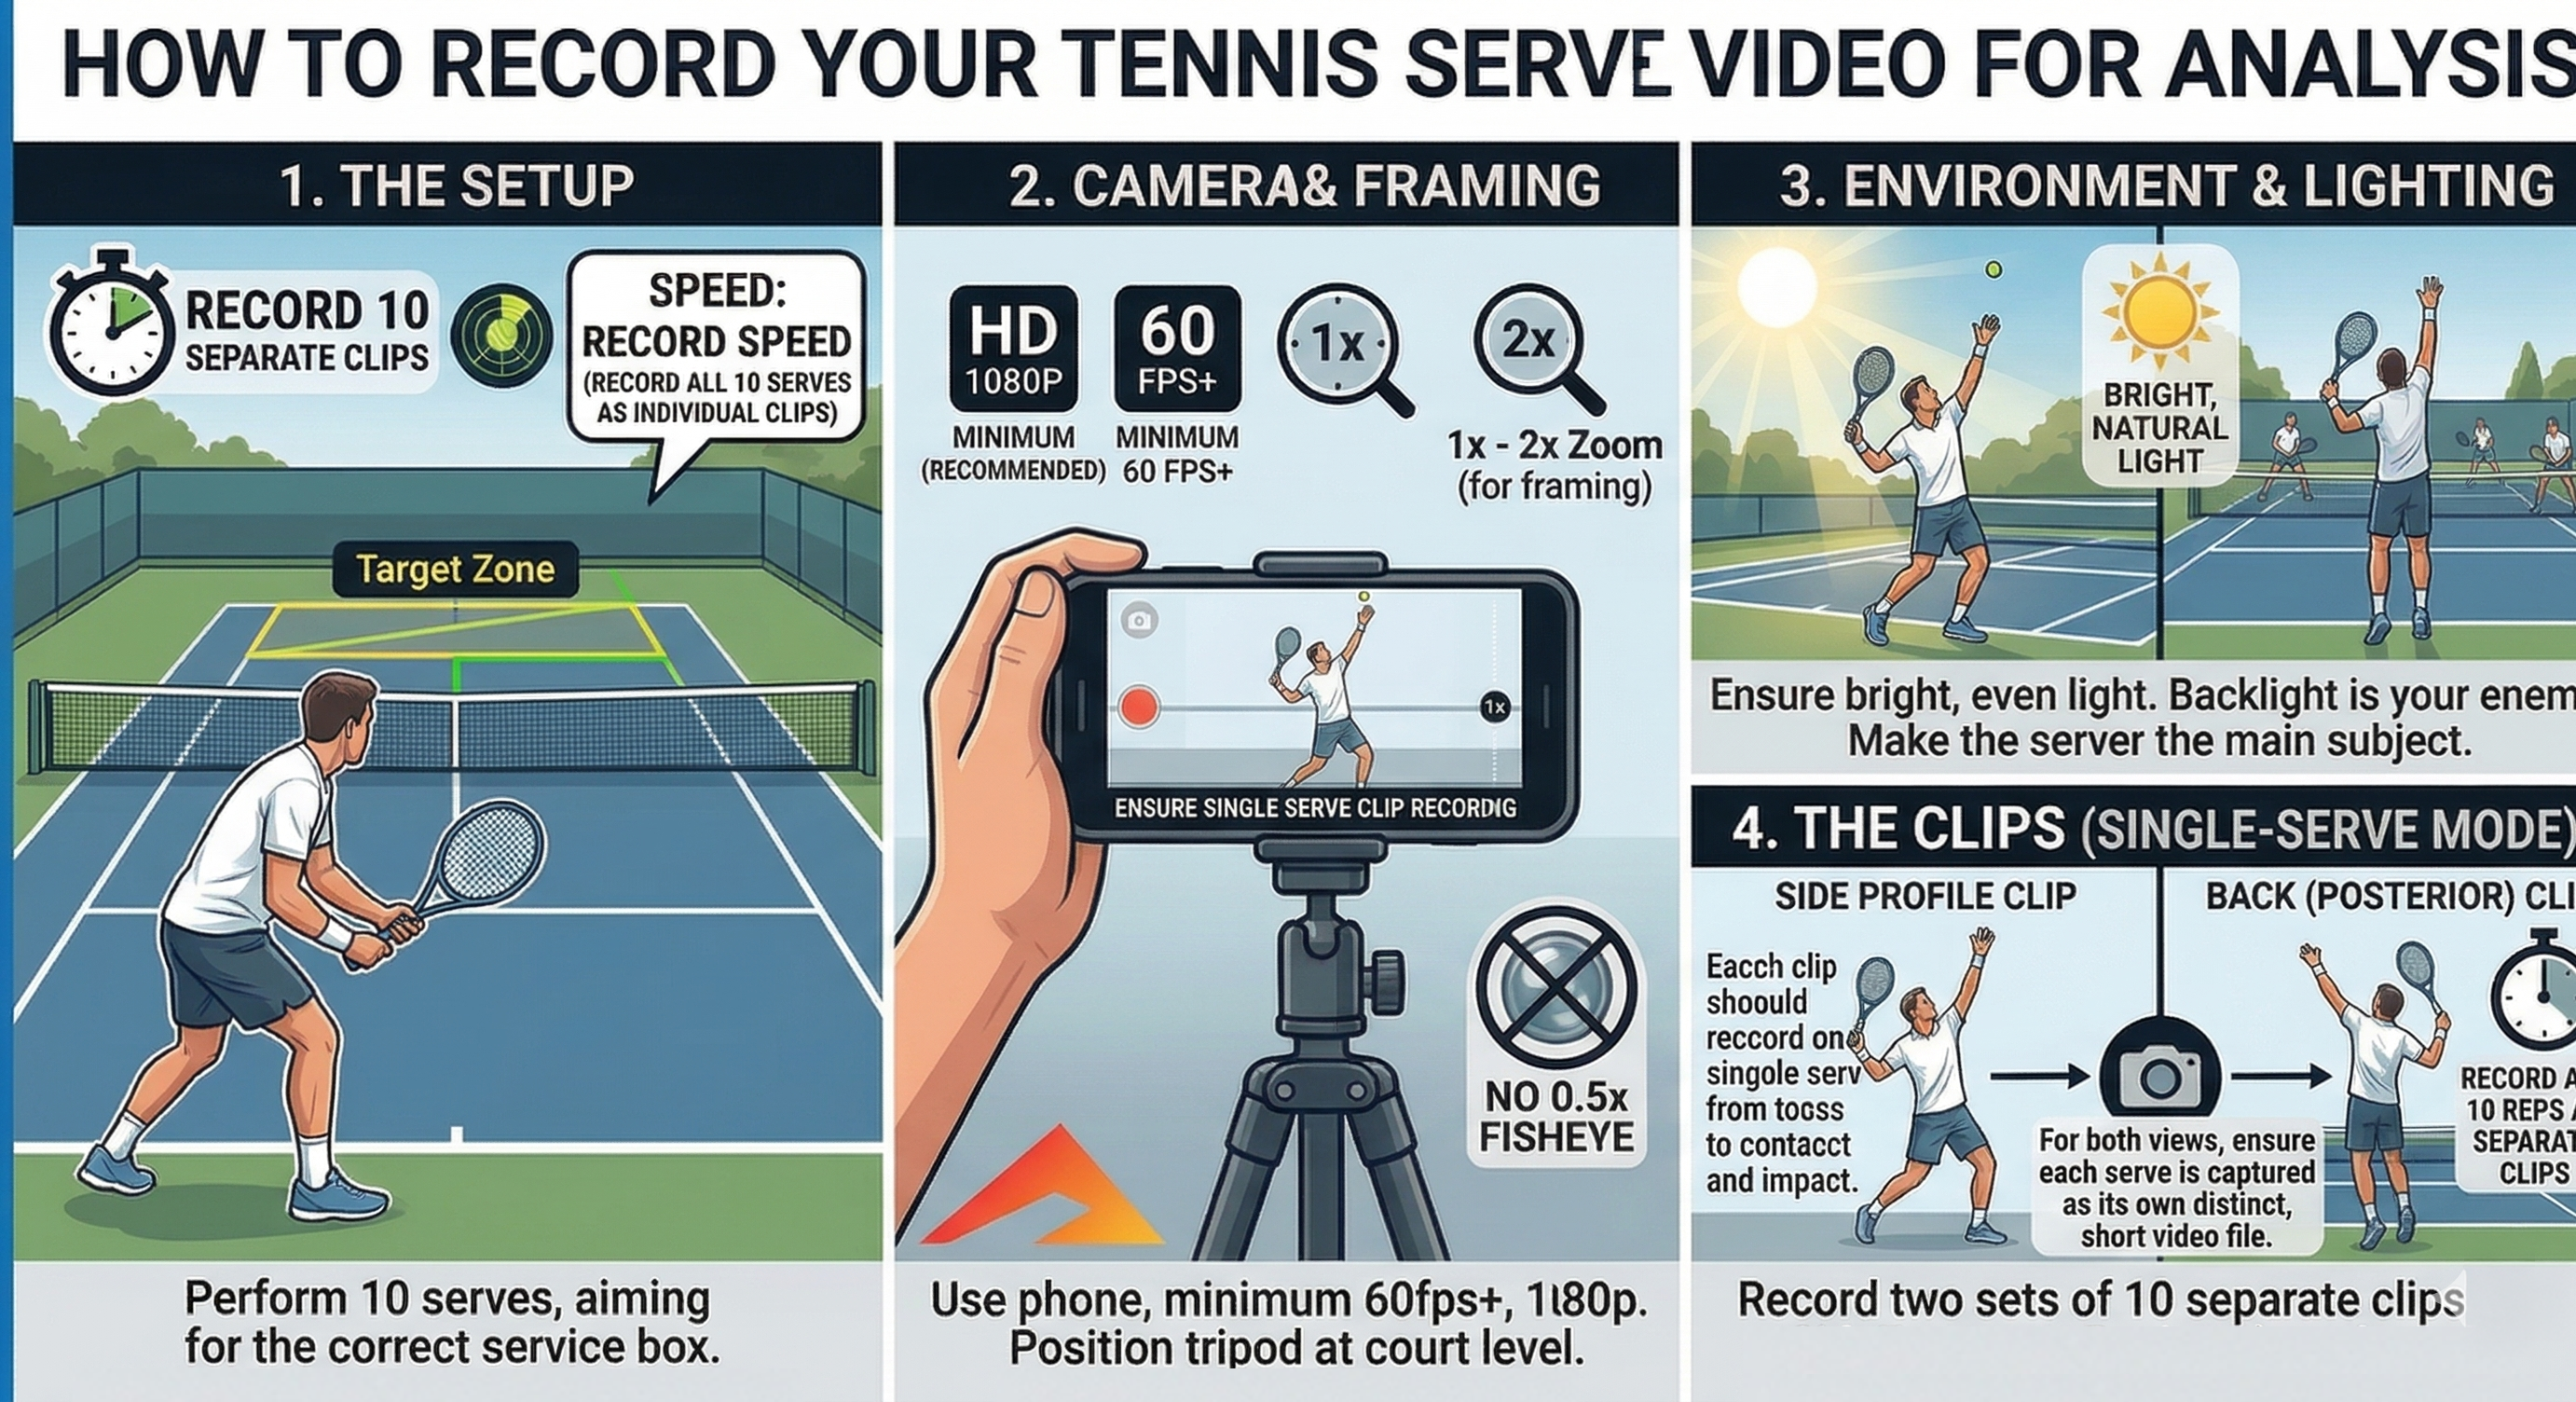
Record separate serve clips with the full athlete, toss, and landing visible from start to finish.
- Step 1: Record individual clips. Capture one serve per video so toss start, trophy, contact, and landing are easy to isolate and compare.
- Step 2: Use the right settings. Record at 1080p or better and 60 fps when possible so fast racket and ball events do not blur together. The app analyzes every frame of the video, so a higher frame rate gives finer toss, contact and landing timing. Slow motion saved as a normal-speed video also works: pick the frame rate you recorded at in the app so the times come out right.
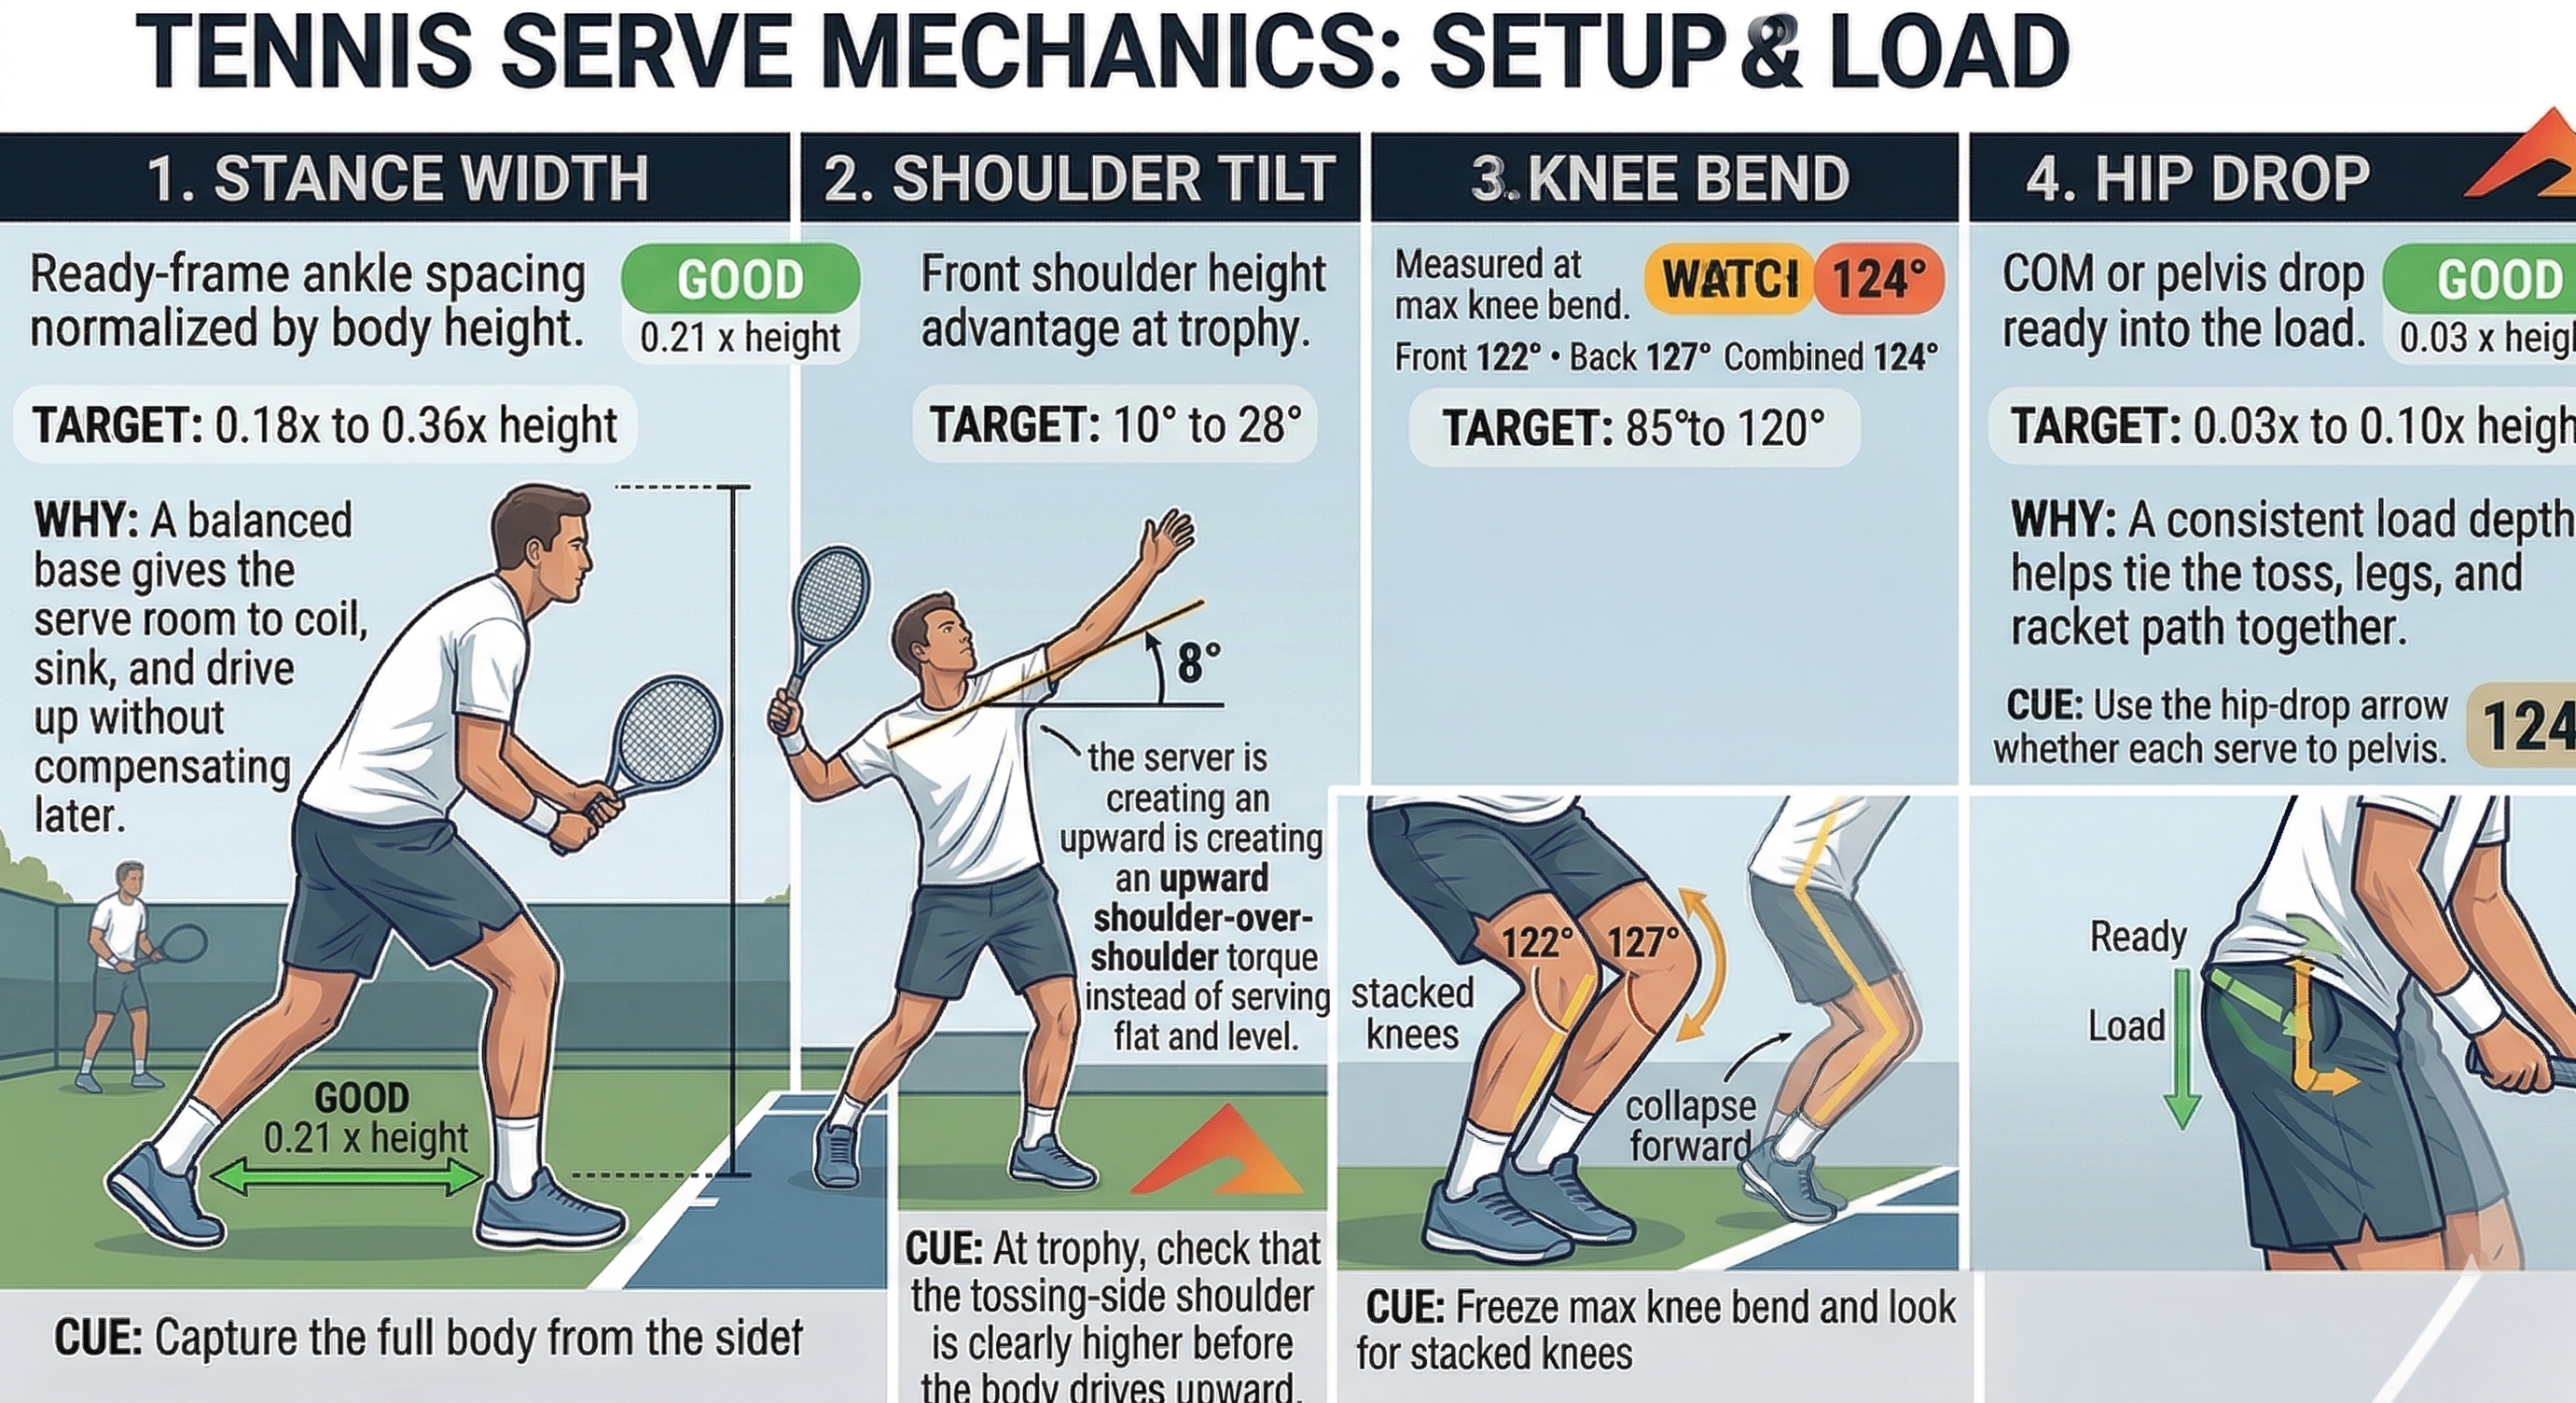
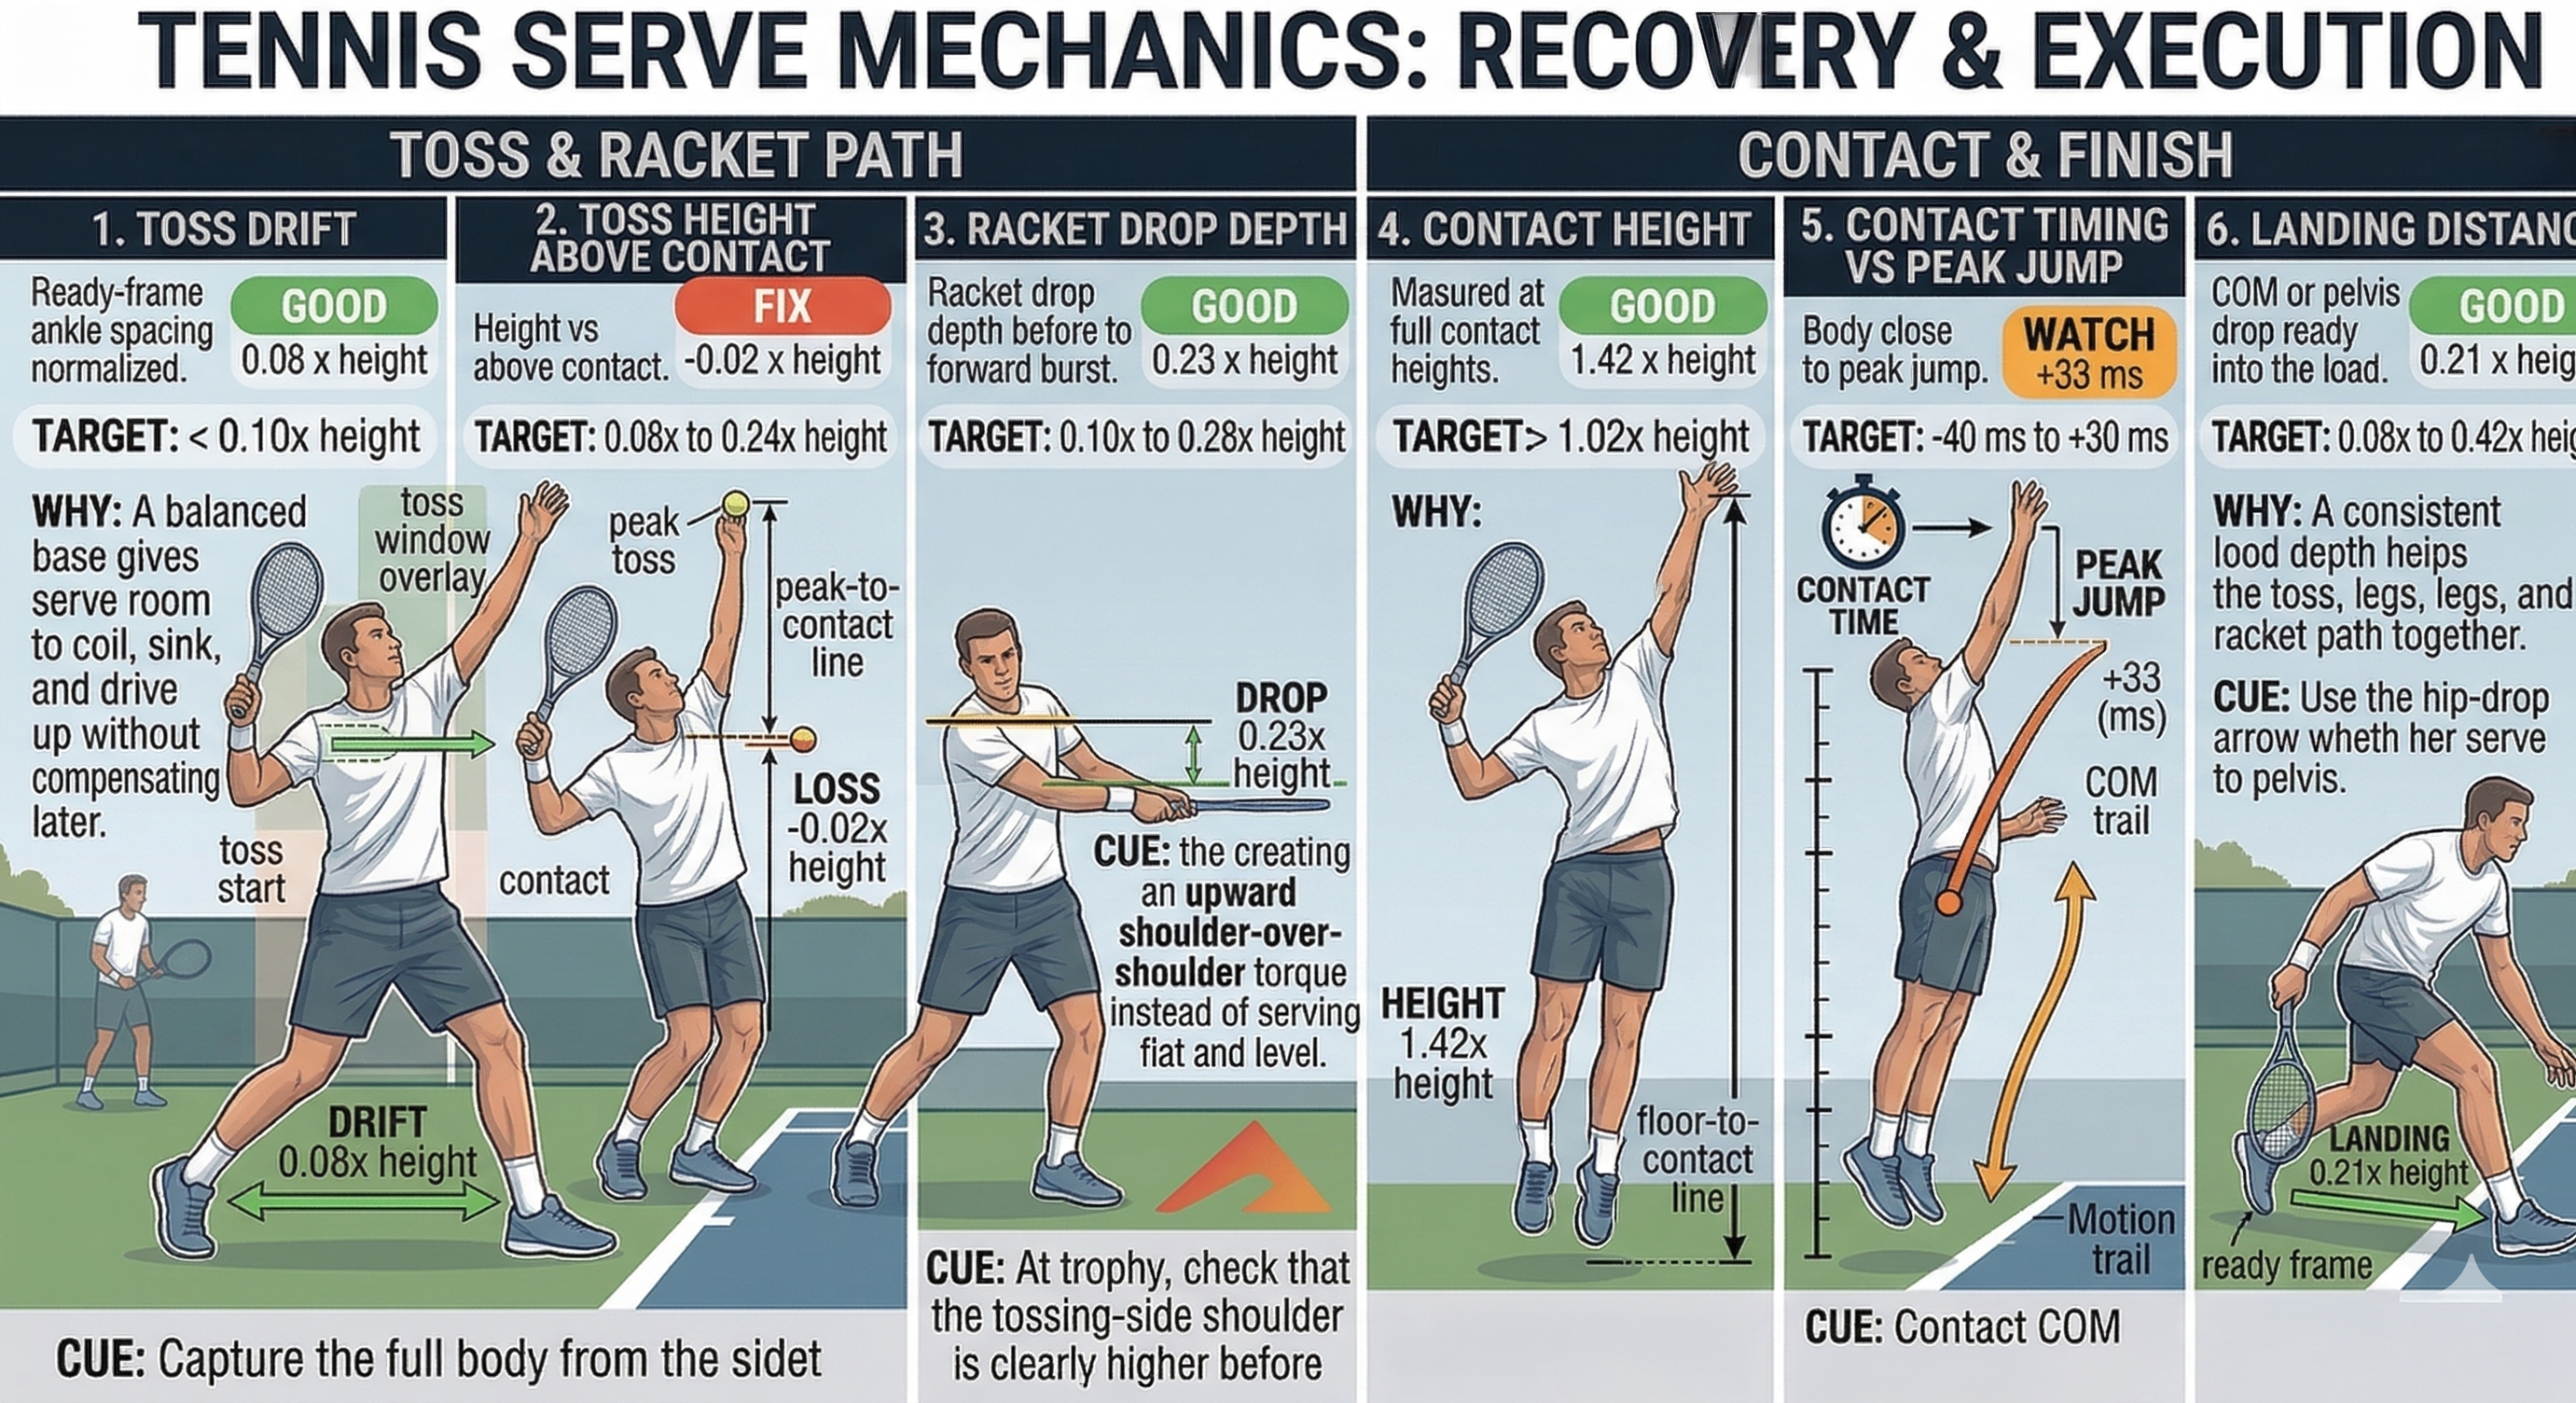
- Step 3: Frame from the side. A side or slight rear-side angle usually gives the cleanest view of the tossing arm, knee bend, racket drop, contact height, and landing distance.
- Step 4: Keep the whole action in frame. Leave enough room above the athlete for the peak toss and enough room in front for the landing into the court.
- Step 5: Control the environment. Use bright, even light, keep the server as the clearest subject in view, and avoid zoom settings or fisheye lenses that distort the body lines.
For benchmarking sessions, record multiple serves from the same setup. Consistent angle and framing make the setup-and-load ratings much more useful from session to session.